Saturday, December 19, 2015

Trim the Tree Bears

Here is my Design Team post today for Papercraftingworld
Today I am making Christmas presents ---I have 2 12x12 pictures to be framed and given as gifts.
I love Melinda's bears but I went nuts for this Flourished Tree as soon as I cut one!
My title and bears are from the Bears-W-Ornaments-SET-cf and the tree is Tree-Flourished-v12-CF

As you can see, I made 2 at the same time.  I had some color shaded paper -I cut out the tree and had an OMG idea, then I cut the 2nd one and inset them into the opposite page.  I used gold vellum behind the tree and cut the star from Cricut.  The santa hat was a die from Cottage Cutz and fit perfectly!!  I made the 2nd set of bears  POLAR, and they turned out sooo cute!
I shaded the bears with my Pebbles chalks ( these are one of my favorite things to shade)
I added a little gel pen and glossy accents to the faces and I have some 12x12 frames to make 2 awesome gifts!!
***I am loving the tree file ---- there is a bonus to cutting these....


I had these awesome flourish pieces left over - I will be using them on cards and scrapbook pages.

Thursday, December 10, 2015

Santa's Little Helper scrapbook page


Santa's Little Helper


Here is my Design Team post from today, for Papercraftingworld.com
                                                            I am Loving these cute critters!
                                                          I made a scrapbook Layout today.
  I have the /Santas-Little-Helper-Title-CFb and /Reindeer-Kitty-Cf, as well as Rudy-v12-CF!    The Title and the kitty files are both on sale for .75 over at the shop..papercraftingworld.com

The supplies:
Paper is Recollections -Red Denim
The frames are die cuts - Mama Elephant (All prettied up)
The Hat is a die from Cottage Cutz
The Candy Cane stamp is from Winnie and Walter (Holiday Trimmings)
I used black and white gel pens for some detail and added Glossy Accent to the eyes and hoofs.
I used some bling for the Kitty's berries.
Chalk for the shading.
Wink of stella pens for the bells and the shiny Rudy nose.
Super quick and super cute!!

Here is a closeup for some of the details:


Head over to our blog and check out all the cool projects the design team is creating!!
http://papercraftingworld.blogspot.com/

Sunday, December 6, 2015

Merry Christmas Watercolor card


This awesome stamp is from Inky Antics and I colored it with Watercolor Markers.
I scribble on the craft mat and then pick up the color with my watercolor brush.
They give a great result!
The snowy hills are from Mama Elephant Borderlines.
Bow Easy for the final touch!  Best 5$ I ever spent!

House Mouse Christmas Card

I'm back in the Lady Cage after my vacation in Georgia --
This is my favorite House Mouse stamp.  Colored with my new alcohol markers from Blick! These are great and very affordable markers! Love them! 
 
 
The stamped image is cut from Mama Elephant die- All Prettied up!
The stamped border is Flourish from the Ton stamps.
Add the Bow-easy and all done!

Tuesday, November 17, 2015

SNOW FUN

Hello Crafty Friends - Here is my Design Team Post today for
Papercraftingworld.com
I changed things up a bit and did a 2 page scrapbook layout.
No snow yet in the Poconos but I couldn't resist this super cute  Snow-Fun-Title-CF, which I paired with the Snowflake-Layout-Set-CF.

These files are so fun to design with. You are only limited by your imagination.
I Started with the title and accented the face and the snow with a snow marker.
Here is a close up of the title!


 I Loved the little snowman face so much I cut him out a couple more times for the 2nd page!
I coordinated the colored snowflakes ( especially like the pink ones!!) for both pages.
I took the biggest snowflake and cut the corners down.  Then die cut a circle to make a 2nd spot for a picture! 
I added a couple sprinkles (from Doodlebug) and a couple snowflake sequins.
ALL done - super simple, and super cute.

I hope I inspired you to go out and be crafty!!  
Check out our November Challenge  ( I cant seem to get the red in there this month.)


Thanks for stopping by and checking out the project! 
Go out there and be Crafty!!

Sunday, November 15, 2015

Merry Christmas Cat!

This is "Chimney Cat" from Digital Delights by Louby Loo.
He is colored with Spectum Noir Alcohol Markers and the whole front is stamped with snow, and snowflakes for a suble "snowy" effect.  A couple coordinating layers and a simple greeting heat embossed and all done!! So much cuteness!!!

Happy "Chilly" Howl-idays

These adorable stamps are from Craftin Desert Divas "Chilly" Set.
The background is distress ink, watercolored with a sublte snowflake embossed on top.
The cute huskies are colored with Spectrum noir alcohol markers. A little Glossy accent to make the eyes and nose pop.  Wink of stella glitter on the tag and the hat.
The Igloo is Impression Obsession & the tag is Pretty Pink Posh ( I love these tags - I use them all the time)
The snowy hills are dies from Mama Elephant - Borderlines

Thank you card


This cute little mouse is by GerdaSteinerdesigns!  He is too adorable.  (plus I love his coffee)
He is colored with Spectrum Noir alchohol markers.
I distress inked the edges with the new Wilted Violet from Tim Holtz.  The bow is Frantic Stamper.
The tag and sequins are from Pretty Pink Posh.  Sentiment is Mama Elephant.

Hello sunshine


This is a Digital stamp from Caftin Desert Divas -an Exclusive "Too Cute by Jessica"
Little Lovlies - Umbrella fox.   The image is colored with Spectrum noir alcohol markers.
The shaker has some clear drops, glass beads, and sequins from Pretty Pink Posh.
The banner die is from Mama Elephant and the Greeting is Technique Tuesday, and heat embossed.
The Circles are die cut and I made the sun. 
Lots of Wink of Stella glittering up the umbrella, the banner, the border and the sun.
 

Monday, November 9, 2015

Flower

HELLO crafty friends!
It's Kelli from the Lady Cage!  My post today for Papercraftingworld Design team  is for a special lady who just had her hip replaced, I sent her this cute card I made using the
 Card-Flower-Shaped-CF.
This was really quick to make and it turned out so cute!
 SUPPLIES:
The cut file is the whole card base and you assemble the pieces to the front. 
I used Spectrum Noir Alcohol Markers to do some shading on the pot and the flowers.
Wink of Stella glitter pen on the lace.
Lawn Fawn sweet smiles stamp set for the super cute little face stamps.
The sentiment is heat embossed.
 
I am loving posting for the design team!! Melinda has some Really cute files!!!!

Sunday, November 8, 2015

Hang in There


Hang in there by Darcie's stamps
Doodlebug designs paper,
Spectrum noir alcohol markers,
Pretty pink posh sequins,
Heat embossed greetings & stitched tags by amuse studio.  

Wednesday, November 4, 2015

Masculine Birthday card

This was  a design cut on Cricut with Outdoor Man Cartridge!
I used Spectrum Noir alcohol markers to add definition.
-Tim Holtz distress inks for sky and grass & added some stenciled cloud cover!!
Wink of Stella on the lake to add sparkle and heat embossed greeting.

Another cut from Outdoor man - for the inside!

Tuesday, November 3, 2015

Watercolor Sympathy card

My 1st Watercolor card!
I used Penny Black - Winter song stamp and heat embossed on watercolor paper.
- I used my new Lyra Aqua brush markers to color-- add sentiment, bow, and black dots. 

Monday, November 2, 2015

Happy Birthday -Wine, shaker card


This was a fun card to make for my awesome boss- 
SUPPLIES USED:
I cut the globe with Impression Obsession Snow Gobe die 
-Tim Holtz distress inks for the edges
-Stamp set was Fiskars Aged to Perfection 
-Heat embossed the greetings & glasses
-Spectrum noir alcohol markers for the coloring

Monday, October 26, 2015

Magical- Shaker Card


shaker card -  from Impression Obsession die (snow globe) Trees are Stamp it up ( Lovely as a tree)

Awesome snowflakes from Cas ual Friday's Bring on the Snowflakes & snowy sayings!! From my Christas Magic Stamp of Approval box ❤️💕Catherine Pooler

Monday, October 19, 2015

Doodlebug Thank you

Last but not least,
Doodlebug Kraft in color -pink polka dot paper.
I lightly sponged the top piece and the sentiment is stamped.
I added some of my tiny flowers and sequins for bling.
Some white ribbon and a quick and beautiful "Pink" Thank you!!

DOODLEBUG DESIGNS CHRISTMAS CARD

It's never too early to start making those Christmas Cards...
I Got my Doodlebug Sugarplums pad & every single page is sooo cute.
I loved the trees, and made a "present" card.  Just added some sequins, ribbon and heat embossed & glittered the sentiment.
This collection is adorable!!

DOODLEBUG DESIGNS!!!!

I'm so excited to do some projects with my new Doodlebug Christmas & Winter goodies!
Doodlebug Designs
1st up is an awesome Scrapbook layout with Frosty Friends - My personal FAVORITE!
The adorable animals and love the color palette -blue, teal, turquoise, purple! LOVE IT!
Next I have a card using the same supplies...
 
SUPPLIES:
Doodlebug paper - Frosty friends Pad
Washi tape - Winter Scarf
Sprinkles - Winter Assortment
Tim Holtz - Distress Inks
I cut the critters on my cricut - made them to match the paper.
I used Wink of Stella pen on all the trees, white and gray snowflakes.
The sentiment on the page is shimmer misted and the sentiment on the card is heat embossed.
Added some stickles to the tree and scarf on the page.
I sponged on the distress inks for the backgrounds to compliment the doodlebug paper!
I love the glitter!!


Sunday, October 18, 2015

Baking Fun!


Picture & tag - my latest Design Team post for papercraftingworld!! http://papercraftingworld.com/
CF-SET.htm & http://www.papercraftingworld.com/item_1152/Mouse-n-Cupcake-v13-CF.htm
I used Cricut design space to change the size of the files and used alcohol markers and gel pens to accent the pieces. Used some distress ink on the tag and on the food! I framed the picture in an 8x10 & I have a unique gift .. Ready to go!!
These files are so cute & so easy to work with!! 

Autumn Gold Shimmer

Stamped leaves and sentiment. The side leaves are punched and distress inked. The whole card is Gold shimmer misted and of course some sequins for added bling!

HALLOWEEN PARTY!


I made these for Bailey's party!! Matching envelopes!!


Saturday, October 3, 2015

HAPPY FALL!!!

My latest post for Paper Crafting World  Design Team!!
I used the Kitty 2g cut file and the Pumpkin Vine 210 cut file

I accented Kitty with Wink of Stella glitter pens and gave him some Green jewel eyes.
  I accented him with a bling collar and  white gel pen claws. 
Pumpkins & Vines are accented with embossing and alcohol markers.
The Leaves are distress inked and marker accented.  They are all popped up with dimensionals.
The title is cut from vinyl on the cricut.
Added a washi tape border on top and some sequins.

Tuesday, September 29, 2015

New Baby Card

Angel mouse on a cloud file
From Little Scraps of Heaven Designs.
This mouse is my favorite -- so cute and nice files to work with.
Touched him up with alcohol markers, and cut sentiments from vinyl on the cricut.
Got some awesome spangles at AC moore - distress ink for the background. and glitter on wings and wink of stella glitter pens on the halo and clouds.

Monday, September 28, 2015

Fall projects from Little Scraps of Heaven Desingns

Just completed a couple projects using files from Little Scraps of Heaven Designs--
littlescrapsofheavendesigns.com
SOOOO cute and really easy to work with.
 1st is the "Just Hanging out" file
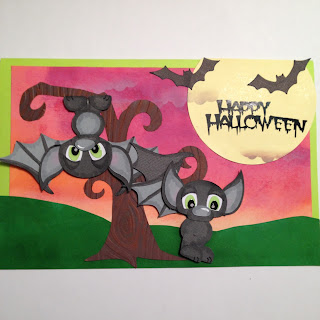
  I just used 2 bats -didn't want to crowd the card, I shimmer misted the moon and used distress ink to do the night sky.  I Touched all the edges on the bats with alcohol markers and I embossed the tree and distress inked it. The sentiment is vinyl cut on the cricut.

Next is" Pumpkin Peeking Mouse" file
The Pumpkin peeking mouse: made an awesome scrapbook layout.  I embossed the pumpkin pieces and distress inked the edges. The sentiment is vinyl cut on the cricut and the leaves I made from distressed paper and punches.

Sunday, September 20, 2015

Birthday cards!!

Here are a couple birthday cards I made recently - the fence is made from Stampin Up "Hardwood" & I sponged the clouds and my favorite paper flowers!  

The 2nd card is a lattice cut file from Cricut and flower from Technique Tueday heat embossed with ebony and the "house mouse"- jumper - both colored with alcohol markets.

Tuesday, September 15, 2015

You Can Never Have Too Much Happy!

SO EXCITED TO SHARE MY FIRST DESIGN TEAM PROJECT
 from Paper Crafting World.....Melin has so many cute files, it was hard to pick just one. These files are so versatile and easy to work with.


Here is the September Challenge:
I made a "happy" card today with the PCW Bear with Flower Pot Set CF.
For my Optional Twist I stamped the Sentiment and the Butterfly.


I cut the flowers out a couple times and curled them with my stylus, then doubled them up to give them depth.
I sponged distress ink onto the edges of the bear and to the flower pot and grass.  I inked the edges of some of the flowers too.
I Glittered all the flowers, (I love the Glitter)
I used Glossy Accent on the bears eyes, and nose to make them shine. I used a  little chalk and gel pen to detail his face.
I stamped the sentiment and the butterfly and heat embossed them. The hearts are punches and I popped up the sentiment with 3D foam.

SUPPLIES USED:
Tim Holtz distress inks and sponges
Wink of Stella Brush glitter - clear
WOW embossing powers
McGill heart punches
Sentiment stamp from KI Hampton arts - Follow Your Dreams set


Monday, September 7, 2015

Design Team

Big News- I am part of the new Design Deam for Paper Crafting World!! A big thanks to Melinda Beltran for giving me the opportunity!

Thursday, September 3, 2015

Some projects from the Lady Cage


THE LADY CAGE
Kelli Horger


 1st is the cover and 2 pages of dividers from a Recipe Book I made for my daughter, who is a Chef.  I used mostly the cricut cartridge "from my kitchen" I embellished with glitter glue and glossy accents and used Washi tape to reinforce the edges.


Next was my 1st attempt at a window card. I didn't have the Madison window that inspired the idea, but I got a window on design space - embossed it and attached with 3d foam for the same appearance.  The siding is just overlapping strips of paper. I filled the windowbox with tiny flowers and stems cut from the cricut.


Next is a collage of some paper flowers, made from the cricut and embellished with distress ink, glitter, and shimmer mist.  The background is pastels and I attached the flowers so it can be framed in a shadowbox or in a frame without glass.


Lastly is a premade card left to suit any occasion, as needed. The bear is from cricut teddy bear parade and she is embellished with chalk and gel pens.  I placed her on some contrasting color and patterned paper to make the colors on the bear pop.
 

The updated Lady Cage